Suzuki Swift GT Chip Installation
Instructions to install a performance chip on your 1989-1994 Suzuki Swift GT/GTi ECU
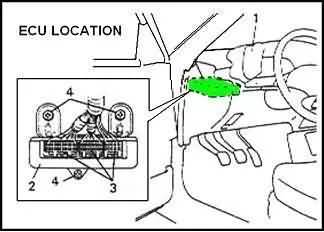
Start by locating the engine computer in your car. It is located under the driver’s side lower dash panel. Remove the bolts that attach the ECM, then carefully pull out the ECU connector by pressing the locking plastic clips. See the drawing below for reference on locating the ECU:
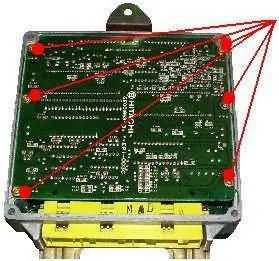
Once the ECU is out, remove the top cover by removing the 4 long bolts that secure its top and bottom metal covers. Now, remove the 6 bolts that hold the top circuit board. You will notice them once you remove the top cover. The picture below shows the location of the 6 bolts to remove.
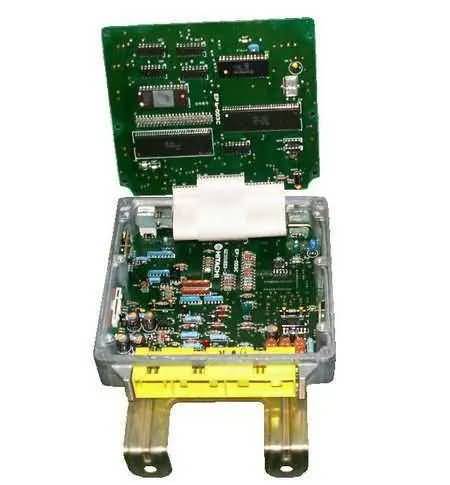
DO NOT pull up the circuit board just yet! First, note that this board is attached to the bottom board with a flexible ribbon connector. Carefully flip out the top board so you don’t break the flexible ribbon. Look at the following picture so you have an idea of the location of the flexible ribbon connector:
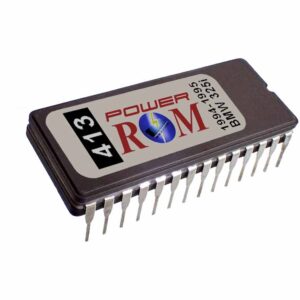
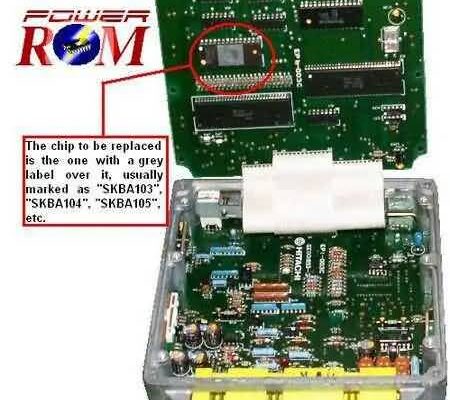
The chip to be replaced is on the top board and will be covered with a silver-colored label or sticker unless it has been replaced before. First, notice the orientation of Pin #1. Write it down if necessary, as pin #1 of the new chip must be installed in the same orientation.
To avoid overheating and damaging the circuit, desolder the chip, then clean up excess solder and flux on the circuit board. To clean excess solder, you may use desoldering braid, and to clean the flux, you may use isopropyl alcohol (91%-99% solution recommended).
Now, insert and solder a 28-pin DIL socket where the chip was soldered, but before you do, check the circuit area for broken copper traces, solder bridges, or other potential problems. Solder the 28-pin DIL socket, then insert the chip into the socket, aligning it the same way the previous chip was installed. Align all the chip pins with their corresponding holes on the socket, then press the chip down firmly or gently tap the top of the chip.
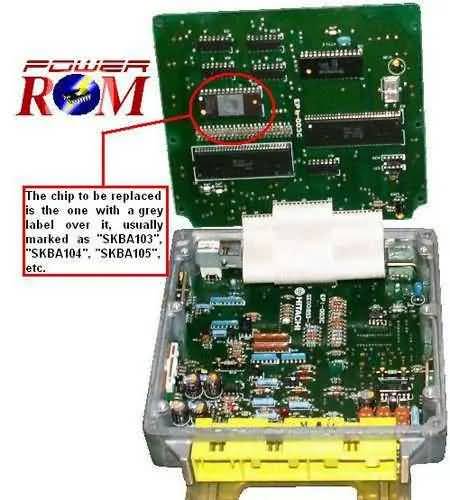
Note: The socket can be inserted in either of two ways, but it helps to install it with the pin #1 mark pointing to the pin #1 mark on the circuit board. That way, you can use it as a reference when swapping chips at any time.
When you finish installing the chip, put back the circuit board with its screws and the computer top and bottom covers with the long bolts. Reinstall the ECU in the car and make sure the connector harnesses snap fully into place when you push them in. Otherwise, some wires might not connect properly, causing intermittent or erratic problems.
Interested in the full wiring diagram of the ECU connections of the 1992-1994 Suzuki Swift GT 1.3L?
(ALWAYS check your SPAM folder in case that you don't see the download in your inbox.)
Your information is safe with us. We take privacy seriously and DO NOT sell or share your information in any way.
Your data will only be used for sending the requested document(s) and for emailing any related information or material that we might offer in any future. If we do so, you will always be provided with a link for unsubscribing if you desire to do so.
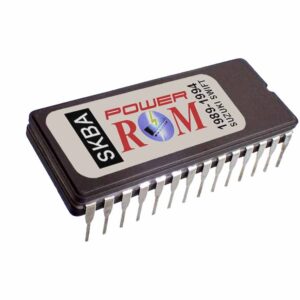
A word of caution when using performance chips. Many sellers offer low-quality performance chips or make false claims about what the chip can do. For example, on a well-known online marketplace, a seller claimed a chip works on 1989-1995 models, which is incorrect. Some chips work on 1989-1991 models, while others work on 1992-1994 models. The performance chip in the link below works in 1989 to 1994 models and adds a nice boost to your car’s engine. Also, please don’t believe the lies about a performance chip boosting horsepower from +20hp to +50hp or more.
A good performance chip can boost your engine’s horsepower from +5hp to around +12hp. That is what the good performance chip in the link below does. Once you try one of these, you won’t want to drive your car without it ever again!
Suzuki Swift GTi Performance Rally Chip