Toyota Immobilizer System Synchronization
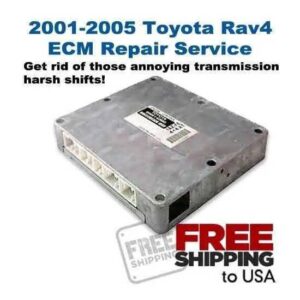
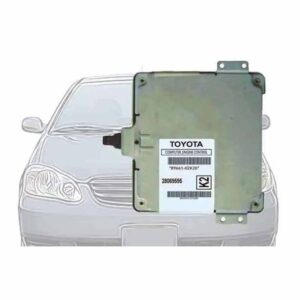
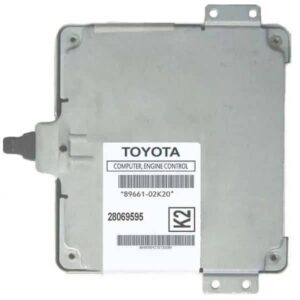
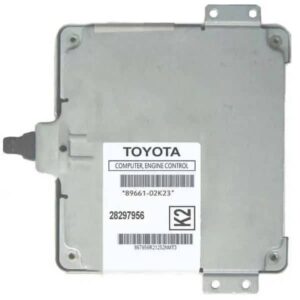
This article is for anyone who wants to replace the Engine Control Module (ECM, from now on) on their Toyota model with a used ECM, and whose car’s immobilizer system (IMMO, from now on) is enabled.
Why would this be needed?
You purchased a replacement ECM, and it will not start the car unless it is programmed or the IMMO is synchronized.
Who is this article NOT intended for:
-If you lost all your keys
-If your vehicle is not a Toyota/Lexus/Scion model
-If your Toyota model is earlier than 1998
-If your ECM is programmed for no-security (IMMO disabled)
-If your vehicle has no IMMO system
This information is covered in another article on this blog, but I wanted to create a dedicated article for customers who buy an ECM from us or another seller and need it programmed.
The Issue
If your Toyota ECM needs to be replaced and your car has the IMMO system enabled, you need to program the ECM so the car starts with your actual keys (transponder keys).
You have two options here in this specific situation: (1) If all keys were lost, bring the car with the replacement ECM to a locksmith so he or she can program the ECM to your keys, or (2) you can try the IMMO synchronization process (sync process from now on) to adapt the IMMO system of the replacement ECM to the IMMO system of your car if you have a functional master key.
Different Situations
If you buy an ECM from us that is intended for a car with the IMMO system enabled, we will either, send it to you programmed in a way that it auto-adapts to your car’s IMMO system as soon as installed (plug and play), or, we will purpossedly program a generic IMMO code into your ECM before shipping it, so you can do the sync process to adapt it to your car. In most cases, we provide a simple jumper tool for the OBD-II connector for ease of use.
You might be asking, why is this? Why can some ECMs be sold as “plug and play,” while others need the sync process? That is because some models have an external IMMOBOX (an ECM for the IMMO system, a.k.a. Transponder Key ECM), and the programming should be done in that box instead of the ECM.
To avoid the situation of a customer buying an ECM, and having to ship their car’s IMMOBOX in, so it can be programmed, and then both parts are sent back (double wait), plus the hassle of uninstalling and reinstalling two parts instead of one, we thought that a better solution was to put a generic IMMO code into the ECM and the customer can do the sync process himself or herself, which is a simple process and requires no special tools.
Remember, all this is to avoid calling a locksmith ($$$) to use your purchased ECM.
Requirements
Besides the tools needed to remove or install your ECM, for the sync process itself, you will need the following:
1. A working, registered master key: The master key is any key with a black plastic handle, as opposed to the valet key that has the grey plastic handle. It must be a key that already starts your engine (a.k.a. registered).

2. The battery of the vehicle must be 100% charged: Since the job will take at least 30 minutes with the car in the ignition-on position, but with the engine not running. A weak or not fully charged battery may drop below the minimum voltage needed, and you’ll need to fully charge the battery and start the process over.

NOTE: If you connect a charger to your car battery to ensure full capacity, it must be a low-electronic-noise charger. The power output from the common boost chargers is often not filtered. That distortion can prevent the process from succeeding. In that case, use the boost charger to fully charge the battery, then disconnect the charger and start the sync process.
3. A piece of solid wire cable, or even a paperclip.

The Process
1. Install the replacement ECM into the car.
2. Locate the OBD-II diagnostics port connector in your car. It is often located in the lower-left front panel, around the steering area. Sometimes it is behind a small compartment with a front lid. See the picture below for reference.

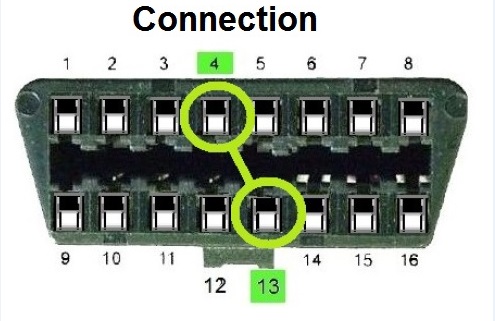
3. Once the connector is located, identify the terminals #4 and #13. The connector is a “D” shell type with 16 terminals (2 8-terminal lines), and you start counting the terminals at the wider area, from left to right on both lines. The illustration below shows the order.

4. Once the terminals #4 and #13 are identified, remove any key from the ignition lock and connect (jump) both terminals by inserting a solid conductor wire or a paperclip. If you use a bare conductor, like a paperclip, don’t worry about shock hazards. There is no risk of electrical shock because we are working with computer logic-level signals of 5 volts. Also, the battery voltage is 12 volts, which is harmless to the touch.

5. Once you place the jumper, put the working key into the ignition cylinder and turn it all the way forward to the ignition “on” position, just before engaging the starter.

6. Now leave it like that for at least 30 minutes while the ECM is adapted to the IMMO system of your car. You can tell it is working when some dashboard lights start flashing randomly, like in the animated picture below. If that doesn’t happen, something is wrong with the jumper connection, and the programming isn’t taking place.

7. After 30 minutes, you can turn off the key and remove it, then also remove the jumper from the OBD-II port. When the jumper is removed, you can reinsert the key and start your car.
Troubleshooting
1. If your car did not start, and the lights did not blink when the jumper was in place with the igntion turned on, it indicates either a connection problem with the jumper, like the clip or wire used for the connection was not doing a good electrical contact with both terminals #4 and #13, or a problem with the port wiring itself, like a loose ground or similar.
2. Make sure that you are using the correct terminals and that they indeed are terminals #4 and #13. Refer to the OBD-II port illustration elsewhere above on this page for corroboration of the terminals’ locations.
3. If the lights were blinking and the car did not start, try it again from zero, but this time allow a bit more than 30 minutes. Again, the battery voltage is very important for this to work. A low battery will not do the job.
If, after trying again, your car does not start, then you will need to consider the possibility that either the ECM is no good, or it is not compatible with your car, or your car has other issues that prevent it from starting, or it may have a secondary security system, like an aftermarket alarm system that needs to be reset.
This process is simple, safe, and easy, and it is integrated into almost all Toyota models from 1998 onward to make it easier to adapt a used ECM when the immobilizer system is in place.